13 September 2016

Shooting on Forward

After the completion of my first Unity tutorial, I felt eager to jump straight into the next one. This teaches the process involved to create a space shooter game, similar to the classic 'Space Invaders', which included a few assets including textured models, prefabs and audio files.

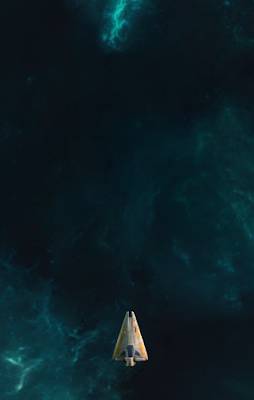
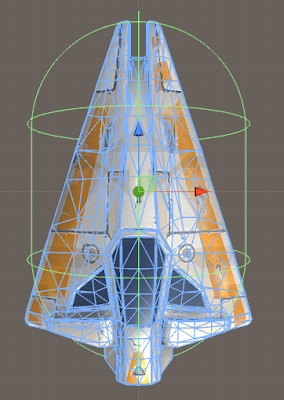
The ship with a capsule collider.

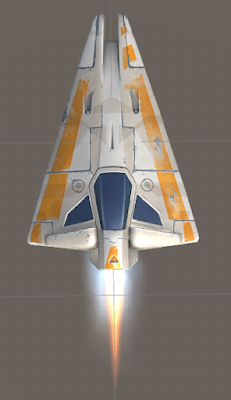
The rocket mesh was imported into the scene and a capsule collider was initially created and altered to fit around the ship. However a simplified version of the model was also available, so a mesh collider was used instead instead. In the settings, the 'Is Trigger' property was activated for later stages. A flame VFX prefab was also imported, becoming a child of the ship.

A preview of the VFX flame.

The gizmos for the VFX flame.


Three directional lights were created; the main light (similar to the Sun), a fill light and a rim light. When the background quad was created and textured, the lights affected the appearance of its texture, so the material's shader was changed to an Unlit Texture, allowing to simply display the texture without any lighting effects.

The ship model with lighting and an unlit background.

Although this is still an early stage into the tutorial, good progress has been made and I am remembering a lot of the processes involved for dealing with assets and the Inspector within Unity. I am aiming to complete all of the tutorials available before the course starts in October, so for now I will be pushing on with the Space Shooter.

4 September 2016

A New Beginning

This September I will be transferring to Plymouth College of Art to study Game Arts - enabling me to gain the necessary skills to work within the gaming industry. To learn the ropes of the new course, I've been begun following Unity tutorials, starting with the very basic: make a ball roll.

Not only was this my introduction to Unity, but the first time that I have worked with C# scripting. The following script allowed the player object (aka, the ball) to move in the x and z axis using the W, A, S, D keys.


By this stage, my scene includes the player object, directional lighting, a camera and polygon plane to act as the ground.


The camera currently remains stationary, meaning that it does not see much of the gameplay when the ball moves. In the hierarchy window, the camera was made a child of the player, causing it to follow the ball when it moves or rotates. However, this caused the camera to crazily spin out when tested in play-mode, so a script has been created instead:


Now the camera follows without rotating - even if the ball falls off the edge of the plane. Next, an empty game object was created to contain the wall objects - allowing organisation within the hierarchy. Cubes were then created, scaled and positioned as appropriate, working as walls to stop the ball at the edge.


The collectibles objects could then be placed into the game. In order to seem collectible, the objects must attract the player. A cube was initially created to sit on the ground, but was scaled down to half the size, giving it the illusion of it floating. It was then textured with a yellow material and rotated by 45° in all rotation axis to create the impression of being a special object. However, this was still not an obvious enough special object. The following script was written to add a rotation movement to the object:


The pick up object was turned into a prefab asset, allowing me to duplicate the item with each instance remaining identical. These were sorted in the hierarchy under an empty, then each instance was positioned on the game area. To collect these objects, Unity needs to detect collisions between the player object and the pick up objects.


The script above allows the player object to collide with the collectables, deactivating them individually after collection. The box collider of the pick up object was also set as a trigger and a kinematic Rigidbody was implemented to allow the cubes to float regardless of physics.

UI text elements were created to display both the points in relation to how many collectibles had been picked up, and to signify when they had all been collected. After altering the positions of said text, the Player Controller script was altered as follows, allowing them to work effectively:

As the game is finally complete, the build has been created as a standalone for Windows and works as expected. I feel that this tutorial worked pretty well, giving me a basic understanding of how Unity works. As for scripting, I do not necessarily understand C#, but I am beginning to notice patterns in how functions are written.
11 May 2016

Learning to the Max!

If I want to fulfill my ambition of becoming a game designer, at some point I'll need to buckle down and learn 3ds Max. Today, I made the most of Digital Tutors by spending most of my afternoon powering through a tutorial on the basics of the software.


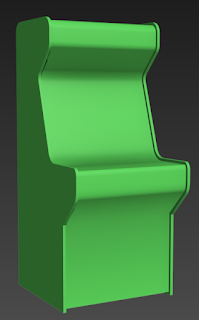
The process begun with the creation of a spline, which was then turned into a piece of 3D geometry. The fillet tool was used on some of the sharper corners to make them desirably rounder. These elements were then duplicated and attached with the bridge tool.


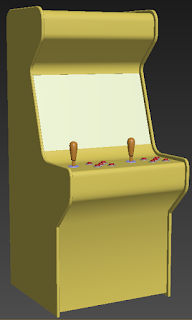
Separate polygon shapes were created, modified and positioned to represent the buttons and joystick. The screen face was duplicated and hidden, before a more shapely screen was put in place. 


The duplicated object was unhidden and positioned to act as a piece of glass - which would later be altered with mental ray materials. 


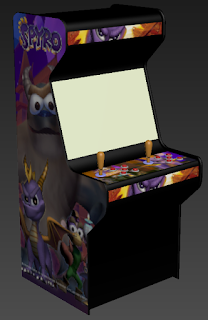
At this stage, the UV unwrapping could begin. All of the processes so far have been fairly similar to that of Autodesk Maya, so it hasn't been too difficult to follow through. I had so far followed the tutorial very closely, so I decided to use the texturing stage as a chance to make the model my own. As 'Spyro the Dragon' is my childhood favourite, I chose an array of images to use in my Photoshop file.


Using the material editor, I created several different plastics for the buttons, joysticks and rims which were individually altered to be either matte or glossy with varying colours. The backplate was input into the settings for the initial render:


I was pretty happy with the progress at this stage, but there were still changes that needed to be made. To begin with, the output ratio for the render was set to 1280x720 and use of the safeframes allowed me to reposition the object to fill the frame.

A skylight was created with a HDR spherical map input to gain better control of the scene's lighting. However, this was still very dark, so the lighting was ramped. A polygon plane was inserted to act as the ground, allowing a shadow to be placed.


I'm feeling pretty happy about my progress so far, so I am aiming to work towards building my knowledge every day through the use of Digital Tutors and YouTube tutorials until I feel comfortable enough to try my own projects.

20 April 2016

Semester 2 Visual Effects: Moodboarding

For my post-production module, I am required to create three different shots, including a collaboration piece with either the film or fashion photography students. I began by creating a moodboard for each of my ideas to gain an idea of the design and ambiance for each.


I created the above moodboard last semester after watching a breakdown reel for 'The Walking Dead', however my teacher suggested that this type of edit was closer to a seamless effect rather than an invisible effect. After a discussion with my teacher, I have decided to shoot interior - similar to the top-left image.


Double exposure is an artistic effect that I have been interested in for a while, so I am looking forward to trying this out. My moodboard features a few animal shots, but it will be much easier to work with a human model.


The above images come from the game 'Heavy Rain'. When the man puts on his glasses, he enters a VR world which allows him to interact with a virtual screen to change his environment.

I have been communicating with Ingrid, a fashion photography student, who has agreed to model for my shot. We will soon be shooting in the TV studio against a green screen. The ensure she knows exactly what I have in mind, I have created the following mock-up:


18 March 2016

Working on WingSpan

The key frames for shot 6 have been tweaked in both the dope sheet and graph editor and shot 8 has been blocked:


The animation is a lot closer to the desired movement of the character, but I still need to animate her facial expressions. The above animatic is made up of both shots 6 and 8 - shot 5 being a close up of the locket in her hands. It was requested that I make it obvious where the shot should cut, so the animation jumps to the start of shot 8.

14 March 2016

Come Fly with Me?

Today I continued to work on the listening project, including the clean design and animation of the airplane:

Plane design from the animatic.
Finished plane design.

Lego bricks fall onto the stage to form the shape of the plane before multiple Lego-Laurie's pop onto the wings and transform the vehicle into a rocket. Below is the progress so far: 

8 March 2016

As Seen On TV!

My friend Dan is a film maker studying a Higher National Diploma in Moving Image. His short film 'Who's That?" won an award at the Celtic Media Festival in 2014. He has big ambition for his final-project film 'As Seen On TV' and has offered me the chance to animate his intro.
He has sent me a few images (above) to give me an idea of the desired style and colour scheme. His flexible brief is for a circle to animate as the title appears, before a series of different shapes animate to introduce the cast. As the narrative contains drugs, surrealism will be key to the overall ambience. An example of the animation style can be seen in the following video at approximately 00:15:
In Adobe After Effects, I've played around with a few effects to experiment with the shapes and colour that could be used - which have so far been approved.

4 March 2016

Wing Span begins

The animation stage has finally begun for the crew project film 'WingSpan'. I've been given shots 6 and 8 to work from as they are fairly similar in terms of action and composition.


This is the first stage of animation for shot 6, which gives a rough idea of Amelia's timing and movement.