29 December 2015

Storyboarding for the BBC's Listening Project

My team consists of Alice Seatherton, Kayleigh George, Krissy Ewins and Megan Ryder. We decided to work on the BBC's listening project for our live brief assignment, which requires us to choose a pre-recorded conversation and create an accompanying animation. The conversion we chose takes place between father and son, Roland and Laurie, who are discussing Lego.

We started the project by having group meetings early on to solidify our idea: keep the animation non-linear, with random objects and characters entering and leaving the shot to accompany the audio. 

The colour palette will be made up of multiple pastel colours with the art style looking hand-drawn, as if created by crayons. We first analysed the script to establish everything that would need to be designed or considered later in the creative process. Alice decided to break the script into coloured segments, which were then assigned to each of us to work on throughout the pre-production process, including part of the storyboard. Below is my three-part storyboard:


19 December 2015

Shooting for Invisible Effects

The Christmas break has given me plenty of time to shoot the footage for my visual effects coursework. However, the winter weather has left me with little choice but to compromise and break away from the shots I had previously planned. I still wanted to create a sky replacement, but the little amount of sunshine made it difficult for me to create silhouette shots.


I instead carried out a sky replacement shot on a Cornish beach and used various in-software tools to increase the brightness and saturation to give the appearance of a sunny day. I created a second moodboard to show the sense of vibrancy and the camera angle I want to use: the shoreline vertically cutting across the shot with an land enclosing the background.


Above shows screengrabs from a few of the test shots I created. Despite having a strong idea of the way I wanted this footage to look, I also created a few experimental shots, such as the top-left where I climbed across rock pools. Regardless, I still went ahead filmed the final shot as originally planned.

I decided to use this edit to push my initiative to explore Adobe After Effects and see if I could work out how to replace a sky without using any tutorials: the process was much easier than anticipated and use of layers allowed me to individually work on each aspect of the shot, breaking apart the environment into background, foreground, mid-ground and sky.


2 December 2015

Rigging Masterclass: Day Three


Hand after rigging and weight painting


Setting a driven key for the IK/FK wrist


The outliner shows the finger after joints and offset controls constrained, and controls parented.


Curl attribute added to the finger. Connection editor established connection: can now freely curl finger in the Z axis, and also move joints individually. Using the same method, I connected the wrist controller and finger control to allow rotation of the index finger in the Y axis.


I think it broke...


Baring in mind this is my first attempt at rigging, this turned out pretty well.

1 December 2015

Rigging Masterclass: Day Two

Continuing with the scene file from yesterday's session, I spent today learning how to rig the spine. Although a lot of the technique involved was similar to rigging of the leg, a few different methods and tools have been used.


Step Snap
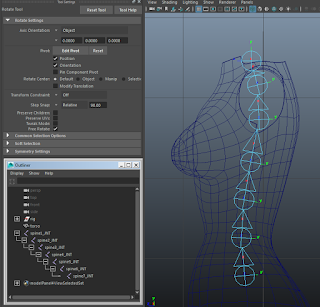
After the spine joints were created, each individual joint was rotated using step snap to align the orients to ensure that the rotation was synchronised.


Advanced Twist Controls

I also used the advanced twist control, which initially appeared to break the model, but was quick to fix the issue with a few alterations in the attribute editor.


Advanced Twist Controls (Fix)


A controller to control the object's centre-of-gravity was created, which was parented to the hip and rib control offset groups.


The final spine rig
In MEL: arclen -ch true "spine_CRV" was used to find the length of a curve, followed by 
createNode multipleDivide -n spineScale_MDV along with a few connections in the Connection Editor to enable a stretchy spine.

Below is the final outliner display for spine:


I then began working on the arm, which included rigging, creating an IK and FK handle and creating attributes.


Adding the FK/IK attribute

In tomorrow's session, we will be continuing to rig the arm.